
Most average users of devices such as computers, notebooks, tablets, and smartphones do not think or need to think about all the possible parameters manufacturers and engineers must combine and implement to make these devices simple.
There are many parameters for a product to ultimately do its job, such as hardware and software performance. However, in this article, the focus will be on a piece of software that serves us so that the applications we use can quickly reach a destination on the global network – the Internet. It is a DNS (Domain Name System) service that allows us to do this. We all use it every day, maybe not knowing about it.
Moreover, each computer is equipped with an operating system whose integral part is a piece of software that allows the resolution process to occur. This software is a service (DNS Client) used by applications, e.g., Internet browser, to know how to find the destination, so the application developer must enable it.
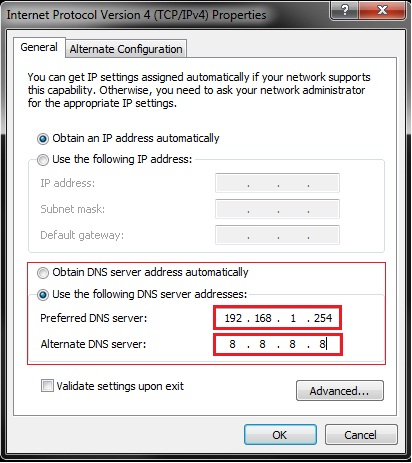
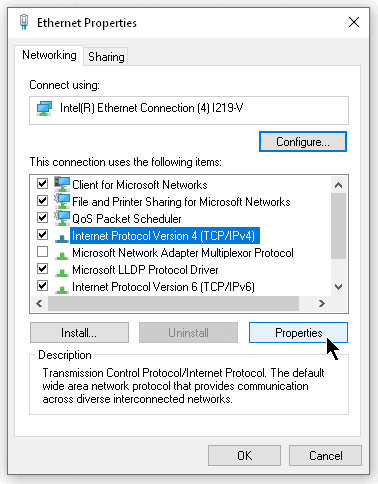
The computer must also have a Network Interface Card and its driver software for the network card to communicate with the TCP / IP stack implemented within the operating system. For a computer to communicate with remote computers by name, it must have default DNS servers, as manually specified in Figure 1 (example, Windows environment).
Parameters for DNS servers do not necessarily have to be set manually. Still, they can be assigned automatically via the Dynamic Host Configuration Protocol (DHCP), configured on our routers, or configured on local servers by the system administrator.
Figure 1: Example of DNS Server Address in Windows Environment
The picture above shows the IP addresses of the DNS server that the DNS client (our computer) contacts in the default order in case he does not know the IP address of the requested name. The preferred DNS server is a local server equipped with a DNS service that works in the resolution process.
If the preferred DNS server is unavailable, the DNS client switches to an alternate DNS server that does the same. Of course, provided the rest of the network protocols are properly configured and operational. An alternative DNS server is Google’s public DNS server listed here. See below step by step how to change your DNS and set up a Google DNS server.
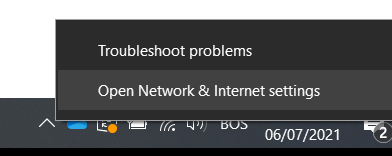
1. Open the network settings by right-clicking on the Open Network and Internet settings icon.
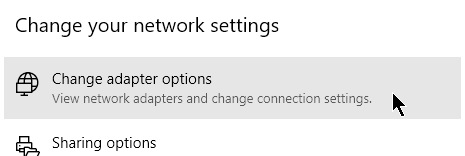
2. Open Change adapter options.
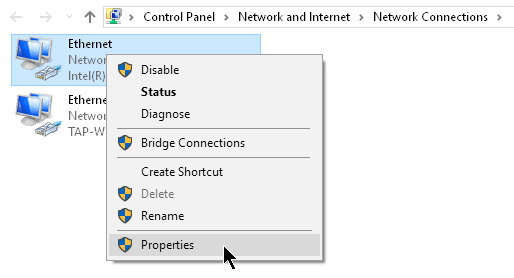
3. Right-click on the active connection link and select Properties.
4. Highlight Internet Protocol Version 4 (TCP / IPv4) and click Properties.
5. Save the current settings before changing them.
At the bottom of the window, you will see the DNS server settings that your system will use if you need DNS checking on the DNS system. Before you make changes to your device’s network settings, save their current status so that you can restore them as needed.
You can create a print screen in the network settings window, and in this way, you can reset the settings. You can also save them in a text file or on a piece of paper.
6. Activate the “Use the following DNS server addresses” option.
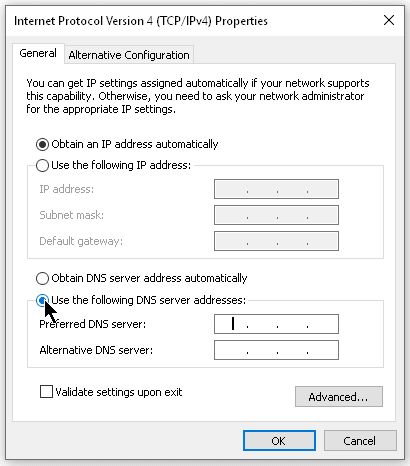
7. In the two Preferred and Alternative DNS server fields, enter the new DNS server.
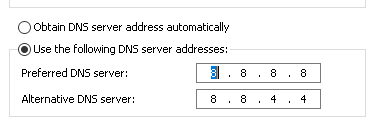
In this example, the parameters of Google’s DNS server are entered, and in addition to Google, you can also use:
- Cloudflare DNS: 1.1.1.1 i 1.0.0.1
- OpenDNS: 208.67.222.222 i 208.67.220.220
8. Save the settings with OK and then test the changes by loading more websites in the browser. If websites do not load, reset the DNS settings on your device. If the websites are loading, it means there are no problems with the settings.
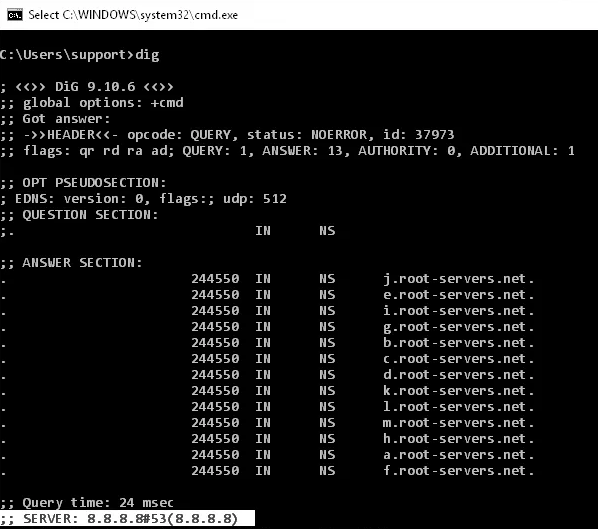
Lastly, you can also check if your device is using new DNS servers set up using the dig tool. For a Windows environment, you need to install dig first, then open cmd (Windows button + R >> type cmd >> OK).
At the terminal of your device, type dig and press Enter. In the results, look for the IP address for the appropriate DNS server. If you get a message that the command is non-existent, it indicates that dig is not installed (Windows only).
The browser must first find out which IP address the domain is directed to load a particular website. IP address verification is performed in the DNS system using special DNS resolvers, which are located on DNS servers. DNS servers are usually provided by your ISP and are automatically set up in your device settings, as shown in this article.
Changing the DNS server in the device settings can also be done when you want to test the website’s loading after you recently changed the DNS information about the domain. If the domain DNS settings have been changed, the ISP’s DNS servers may have cached the previous DNS information.