
If you’re looking for a simple, easy, and seamless way to export WooCommerce orders from your site, you’re in the right place! In today’s step-by-step guide, we will carefully demonstrate the simplicity of WooCommerce export orders that will blow your mind and, most importantly – keep your data safe.
Unsurprisingly, WooCommerce has gained a lot of popularity over the past few years, primarily due to its ease of use and stable and flexible features. While it, unfortunately, doesn’t come with any built-in export options, there’s a handy solution in the form of JEM Plugins’ “WooCommerce Order Export,” which makes the whole process significantly easier. What is more, the plugin comes in both a free and a premium version.
We’re pleased to say the plugin is straightforward to use and has an abundance of innovative, nifty features that won’t waste your time but instead make your WooCommerce export orders virtually effortless. With the help of this easy-to-use plugin, you are free to export WooCommerce to Excel or CSV formats.
However, before going on with your WooCommerce store, you need to ensure you have the correct hosting that will benefit your business and suit your needs. WPMU DEV hosting ticks all the boxes. It’s affordable, fast, secure, fully dedicated, and the #1 rated WordPress host on TrustPilot. Get 20% off any of their plans here.
Even if you’re a novice, you don’t have anything to worry about, as the export WooCommerce tool has been specifically designed to be easy to use for anyone. You can see the entire process in the video below, but we will also go over it in our detailed guide.
So, without further ado, let’s dive into this quick and hassle-free way of exporting data from your WooCommerce store in a few simple steps.
How to Export WooCommerce with the Help of “Order Export for WooCommerce”
The first (and easiest) step in this process is to download and run this user-friendly plugin in your WooCommerce store. After that, the first thing you will see is an Export menu that will present you with five different options, each of which we will expand on below, so keep reading to see your exact next steps.
Date Ranges
This feature is pretty simple to use, and we’re sure you won’t have any issues with this step. You get to pick and choose dates, meaning that you can select a starting and an ending date for your WooCommerce export orders, or if you wish – you can select a predefined range, which is just as simple to use.
Report Formats
As you can probably guess, this simple feature allows you to choose the exact way your data will be edited in the export. The best thing about it? You’re free to custom-pick almost every aspect, from the file name, the date format, to character encoding. Pretty neat, if you ask us.
Export New Orders Only
The last thing you want to happen when you export WooCommerce is accidentally exporting the very same order multiple times, which is where this feature comes in handy.
It remembers all the orders you have exported before your current one, ensuring that no such mistake happens. So, if you tend to export reports regularly, it will remember them all, helping you stay on course and leaving no room for error.
Filters
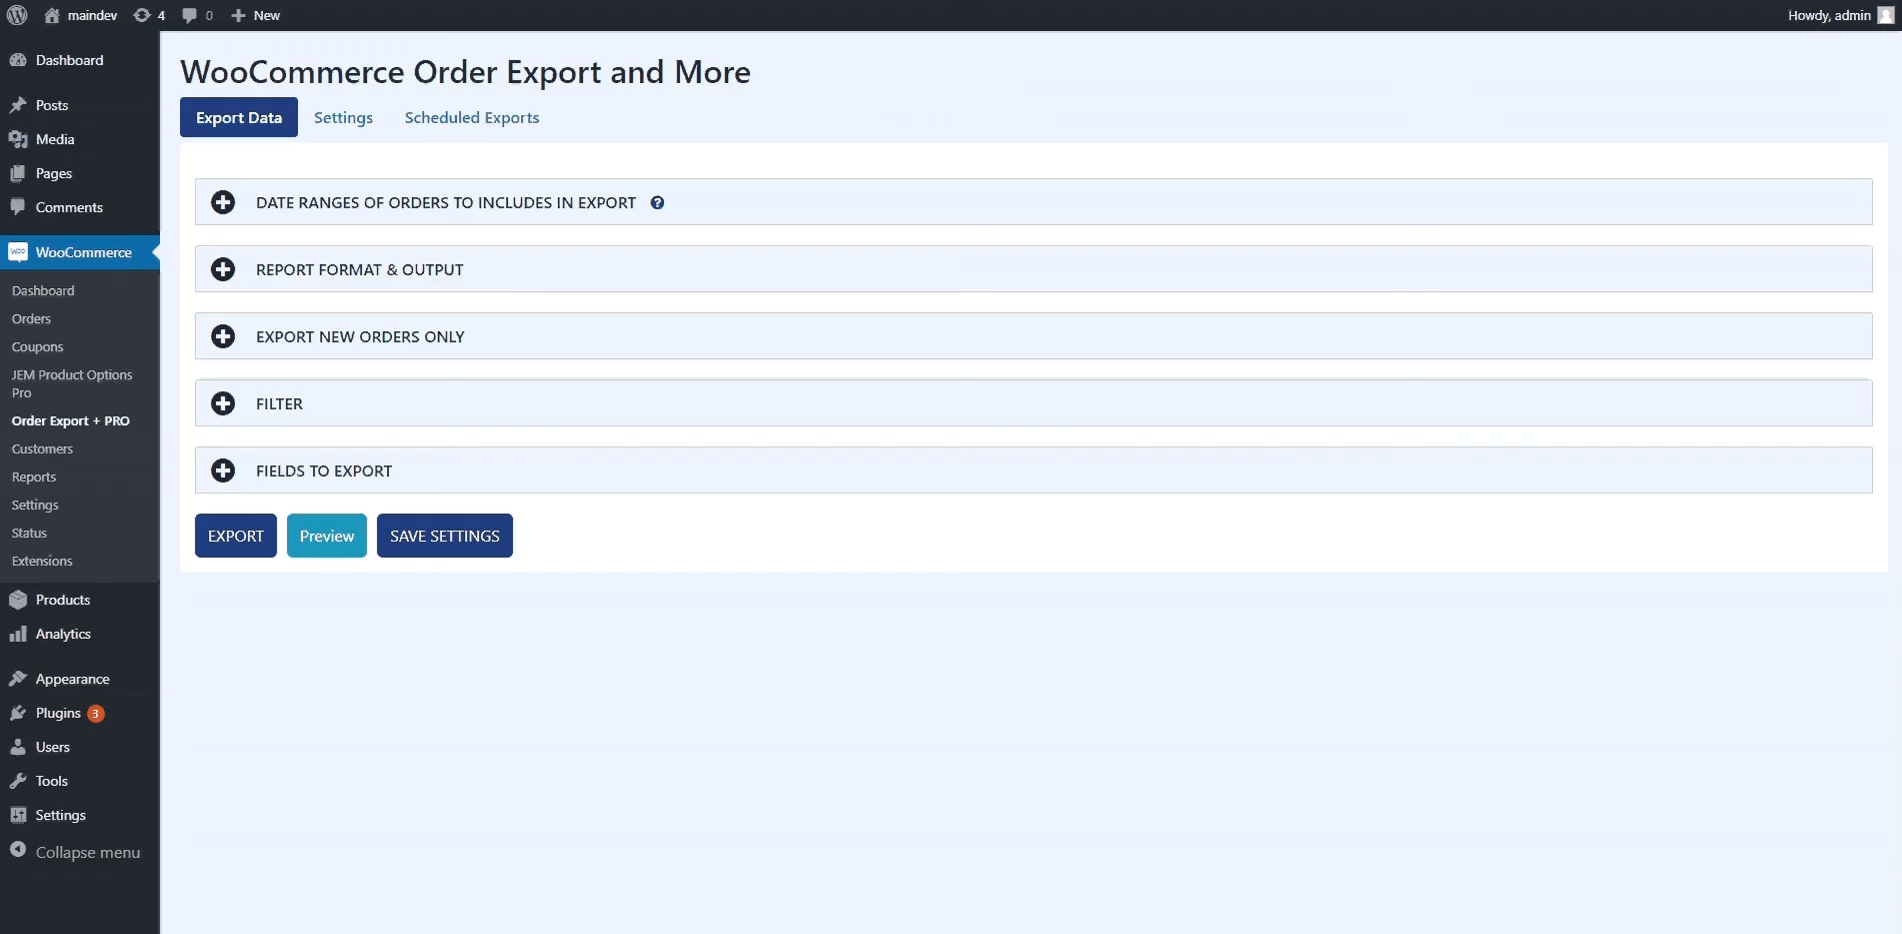
Filtering is another new and excellent function that allows you to filter your orders according to any specifications of your choosing. So, no matter what you want to filter your orders by and how many of them do you like to filter, with the help of this feature, you can choose the criteria yourself and filter as many of them as you want. There are no limitations and restrictions in this regard, which appeals to many users.
Fields to Export
Finally, we’ve come to the last feature on the Menu bar, which also happens to be one of the most important ones. This section will find all the necessary order information neatly categorized into specific groups for ease of use. By using the handy drag-and-drop feature, you can sort everything around with great ease.
You will see everything from product information, user information, billing details, etc. The drag-and-drop feature lets you place everything in the blue box on the left, thus creating your custom report with all your preferred information, including the metadata. It makes for a simple, quick, and seamless process.
Preview Button
If you look at the bottom of the page, you will notice three buttons: Export, Save Settings, and Preview. Given that the first two are self-explanatory, we will focus on the latter and explain what exactly it does. The Preview button is a very convenient feature, as it allows you to see your reports one final time before exporting them.
Why is this so important? Because it ensures that the report is error-free and contains all the information you wanted to include. This feature can be a life-saver as it will prevent any mistakes while helping you save time that you would have to spend on edits and waiting for the new export.
Settings Page
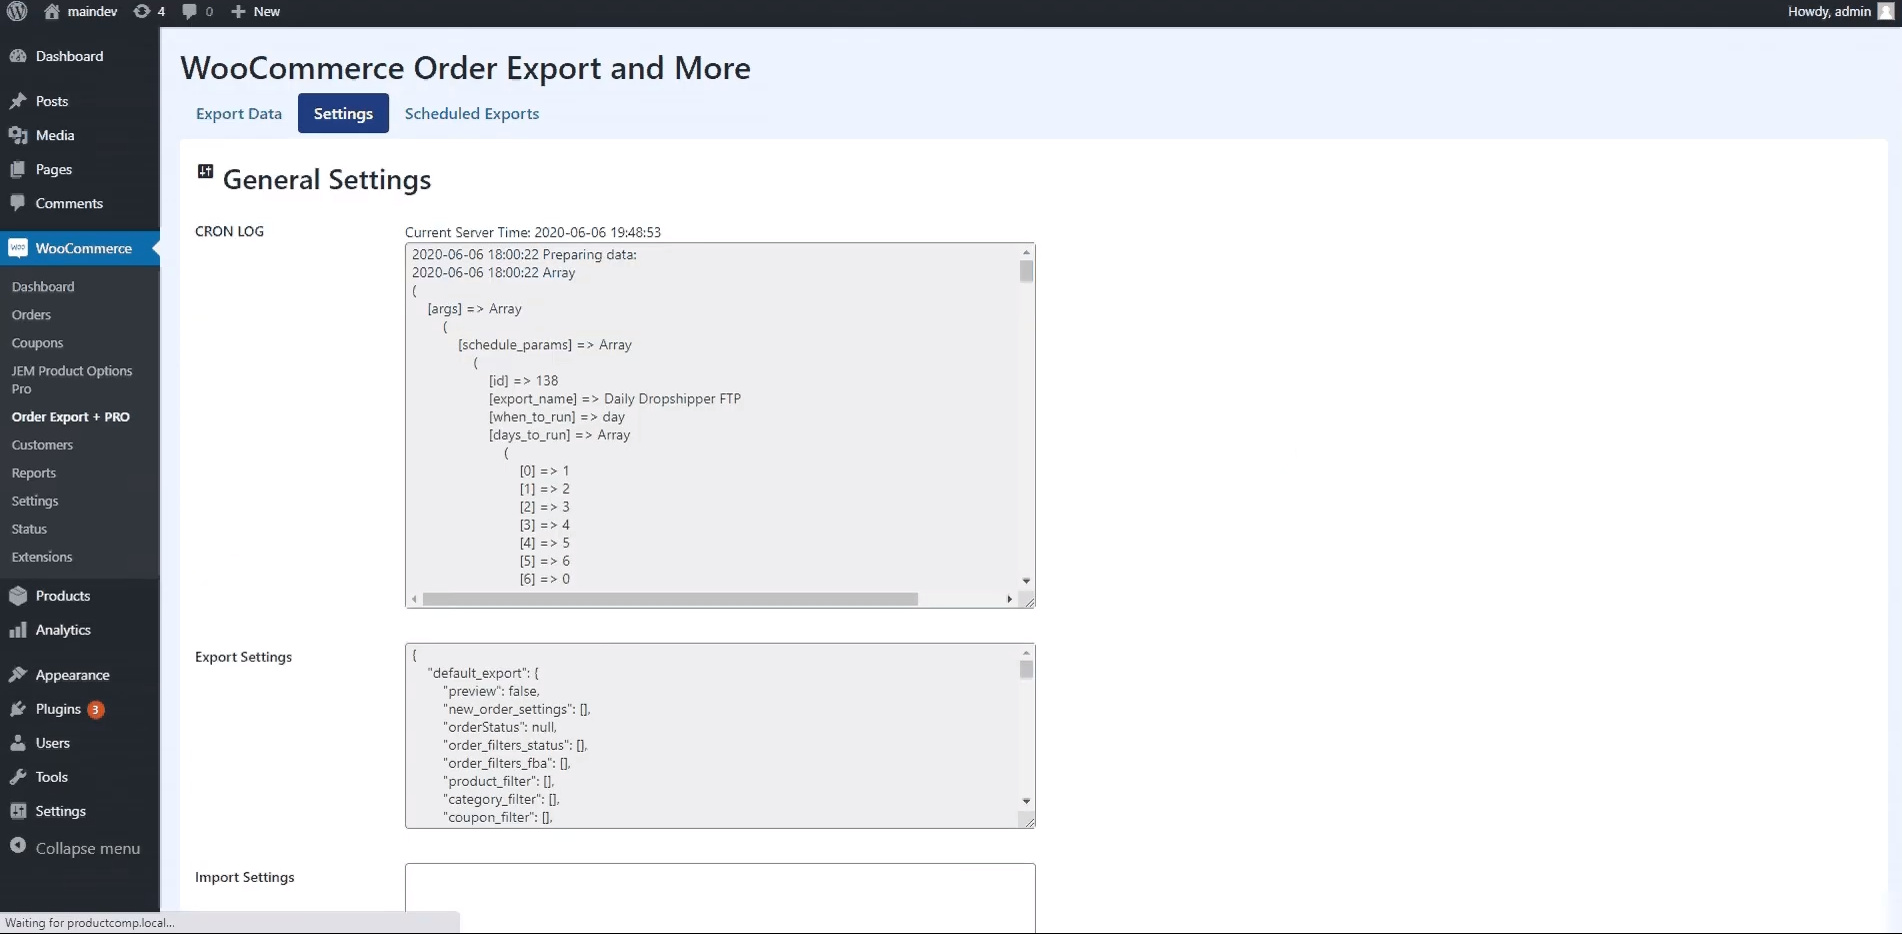
The Settings Page can be found next to the Export Data menu, and while it isn’t as important functionality-wise, it does serve a purpose. It neatly keeps all of your logs and can come in very handy when you’re faced with any issue regarding your WooCommerce export orders, helping you determine the root of the problem.
On top of that, if you click Export Settings located at the bottom of the page, you will be able to copy the export setting and use it on your future reports.
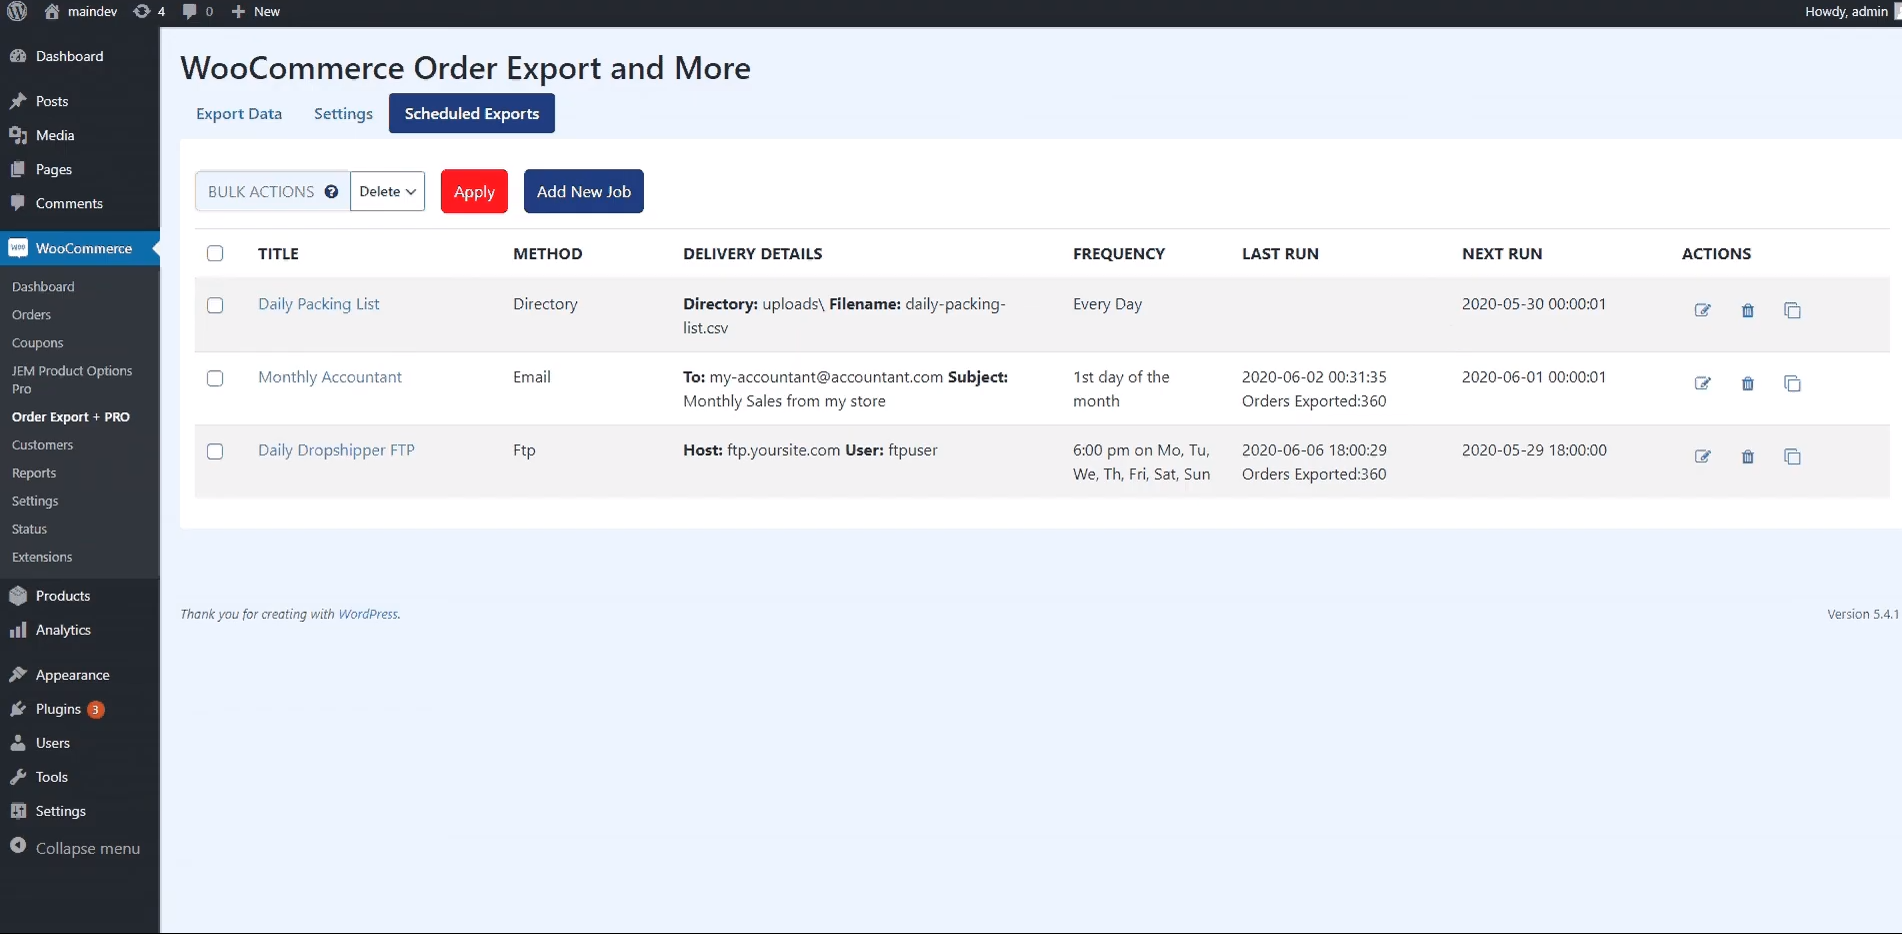
Scheduled Export
Unsurprisingly, this feature is, without a doubt, a user favorite. The flexibility it offers, the possibility to schedule as many reports as you want, and choosing the title and the delivery methods, have made it one of the most popular aspects of the plugin.
You are in no way restricted by the number of reports, and on top of that – you can set a few of them at once. You are allowed to schedule whenever you want them to be delivered to you, making your business operations completely stress-free. This way, the plugin essentially works for you.
Think about it. Perhaps you want to get your reports on the first of the month, or maybe you prefer getting them on the last workday of each month? Now you totally can! It leaves you utterly worry-free without having to add this to your daily to-do list.
We also particularly love Scheduled export having all the relevant information about the report in front of you. You’ll always know when the report was the last run, when it’s going to be run next, as well as its frequency. Using your mouse, you can also edit all the reports in whichever way you want, remove them from your schedule – even clone them.
You’re probably wondering how exactly this whole thing works, right? No worries, we’ve got you! So, the first thing you want to do is simple enough – choose the export name. Next, pick the desired schedule on which you want it exported.
This part is entirely up to you – maybe you want it in the middle of the month, every hour, or the last day of the month. Whichever works for you. Then, choose where you want your report to be exported. The available delivery methods to choose from are email, FTP/SFP, and Directory.
There you go. It’s a simple, quick, and virtually faultless process designed to be user-friendly and work in your favor every step of the way.
Conclusion
As seen from our in-depth guide, this extremely nifty and time-saving plugin is a complete game-changer. It will help you export your WooCommerce orders in just a few simple clicks without adding unnecessary stress. So, even if you’re a beginner when it comes to WooCommerce export orders, you have nothing to worry about.
It’s super easy to install, has a simple user interface, and provides filters to ensure you get the exact orders you need. Hopefully, after having gone through the video, as well as our detailed analysis, you’ll find the process simple, easy, and hassle-free.